Creating a New Data Source by Combining Entities
Creating a New Data Source by Combining Entities
This guide explains how to create a new data source by combining entities that are already available in the FreeText.ai platform.
Prerequisites
- You need to have an active FreeText.ai account.
- You should be logged into your FreeText.ai dashboard.
- You should have already created/uploaded entities within your account.
Step-by-Step Instructions
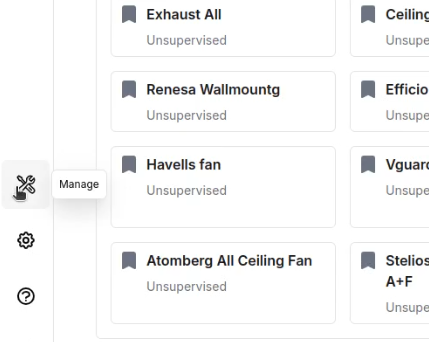
- Navigate to the Data Sources Section:
- From the main dashboard, look for the "Manage" icon or menu item (often found in the left-hand navigation bar).
- Click on "Manage."
- Select "Data Sources" from the Manage menu. This will bring you to the Data Sources management page.
- Initiate the Creation of a New Data Source:
- On the Data Sources page, locate and click the "Create Data Source" button (typically found in the upper-right corner).

- Configure Basic Data Source Details:
-
A form to create a new data source will appear.
-
Category: Select the appropriate category for the new data source. (leave as-is if there is only one category)
-
Name: Enter a descriptive name for the new data source. This name should clearly indicate the purpose or content of the data source.
-
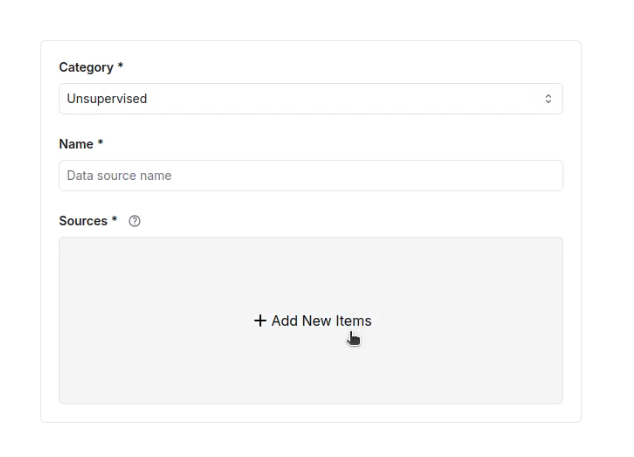
- Add Existing Entities as Sources:
-
In the "Sources" section, click the "+ Add New Items" button.
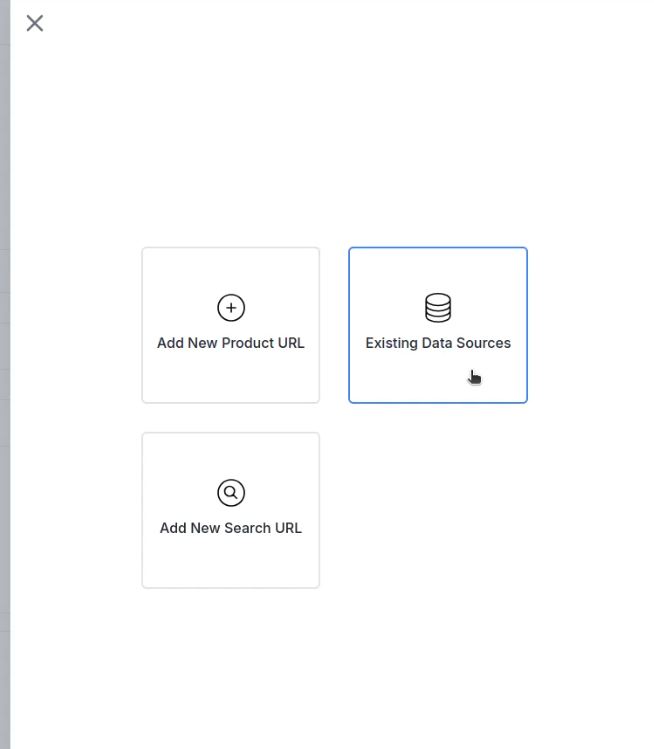
-
In the modal that appears, you will be given three options. Select "Existing Data Sources" to add entities that are already present in the system.
-
Locate the Entities You Want to Combine:
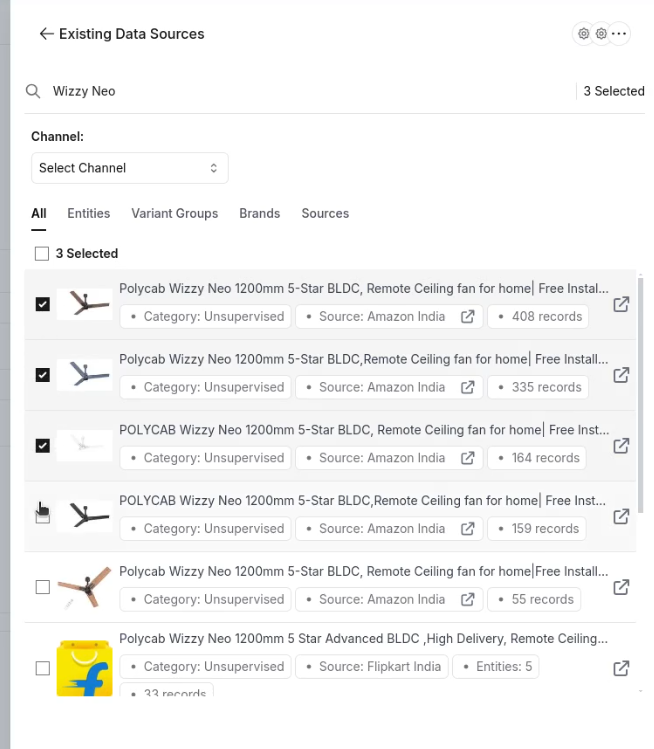
-
Use the search bar, filters, or scroll through the list of available entities to find the ones you want to include in the new data source.
-
Search: You can type the entity name in the search bar to find a specific entity.
-
-
Select the Entities:
-
Check the box next to each entity that you want to add to the new data source.
-
You can select multiple entities to combine them into a single data source.
-
Select "Done" to add them to the sources.
-
-
-
Review the Selected Sources:
- The "Sources" section of the form will now list the entities you have selected.
- You can review the list and remove entities if needed by clicking the "X" next to the entities.
-
Finalize and Create the Data Source:
-
Once you are satisfied with the selected sources and the configured details (Category, Name), click the "Finish" button (usually in the upper-right corner).
-