Manage Topics
Topics are key themes, or subjects that emerge from the customer feedback data, such as product quality, customer service, or pricing. (For example, Topics for fans could be 'Noise', 'Speed', 'Installation', 'Design', etc.). By grouping related feedback into specific topics, you can identify patterns, trends, and areas of improvement.
In the following section, you’ll find instructions on how to add new topics, update existing ones, and delete topics within Freetext.ai:
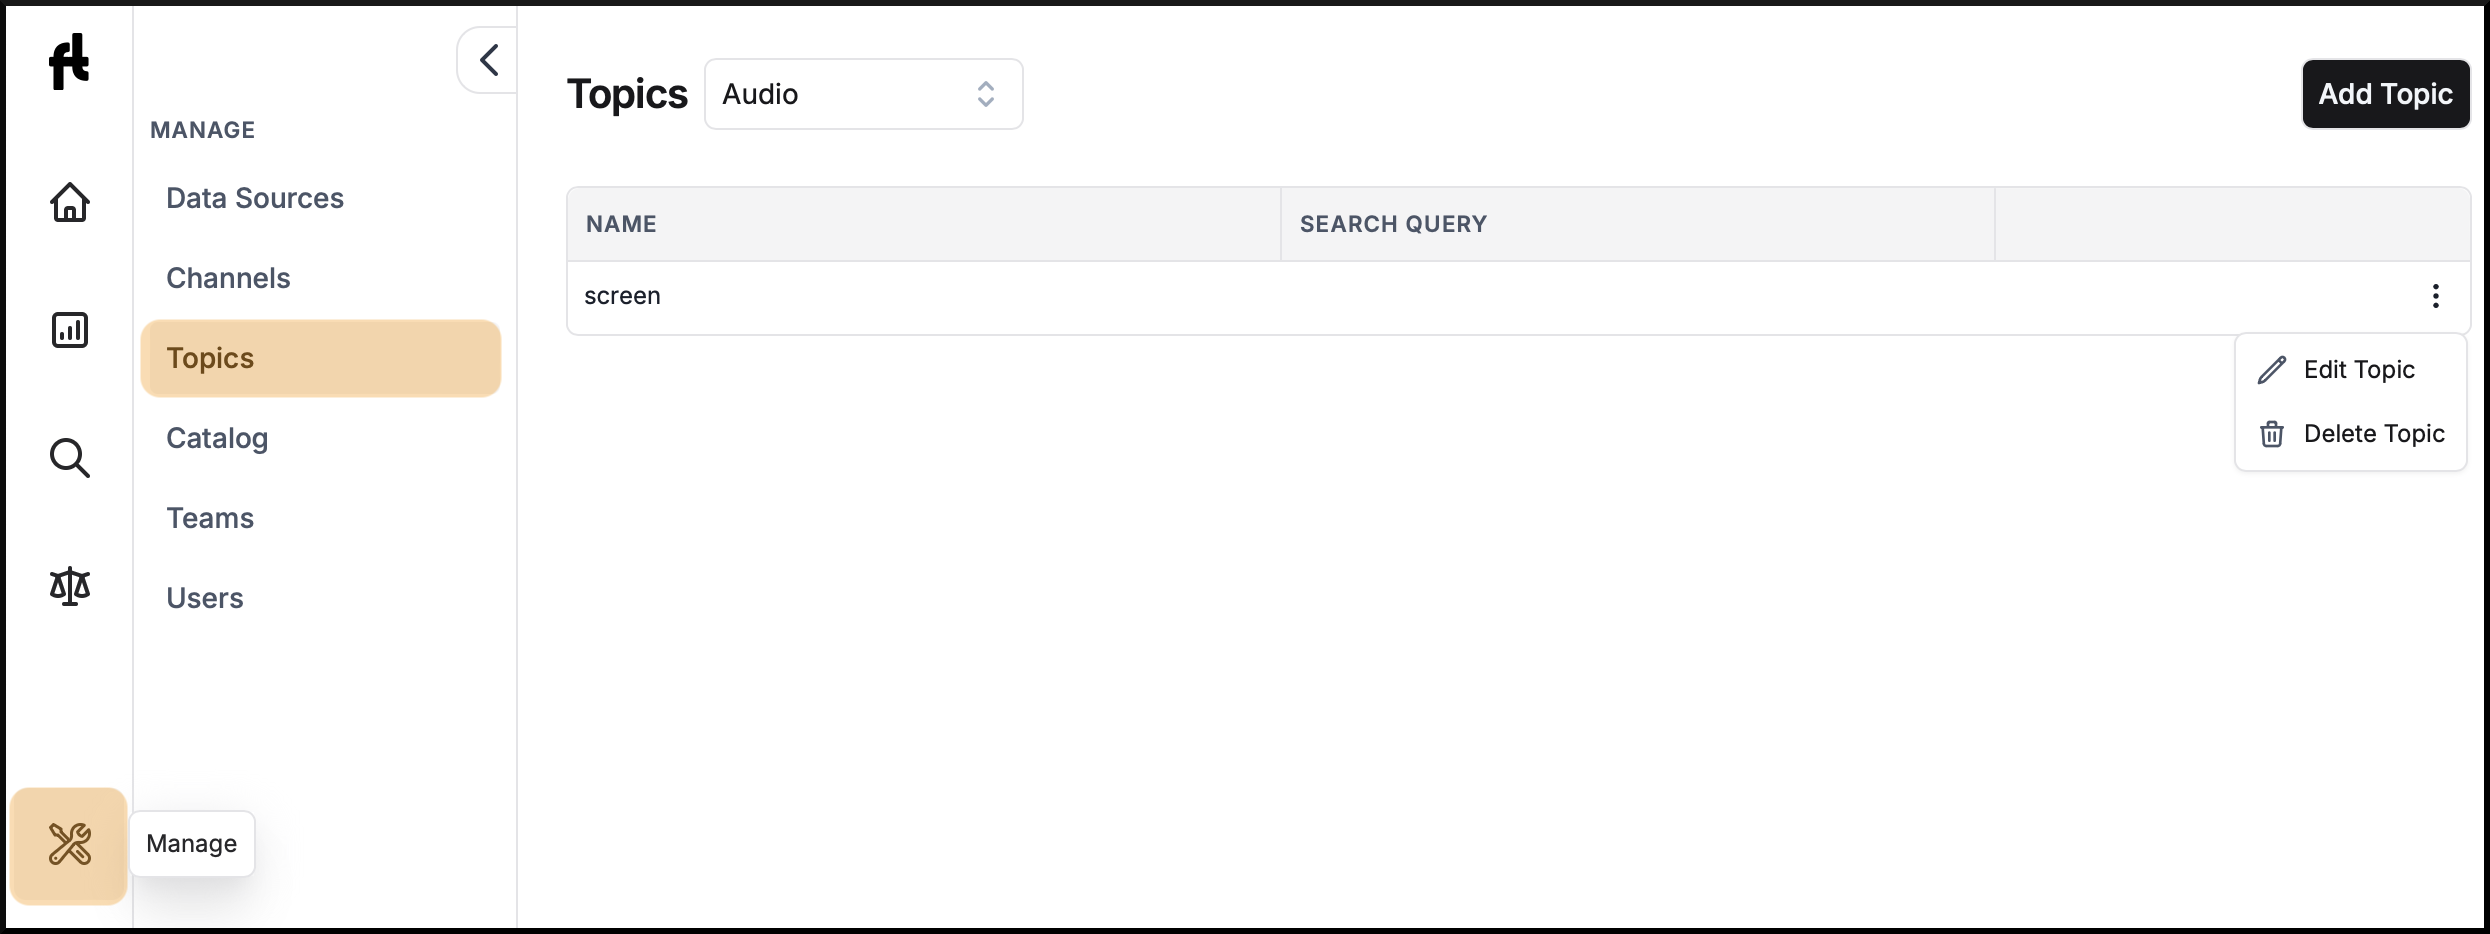
1. Click on ‘Manage’ from the left-hand navigation bar.
2. Click on ‘Topics’.
Here you can:
1. Create Topic
2. Update Topic
3. Delete Topic
Create Topic
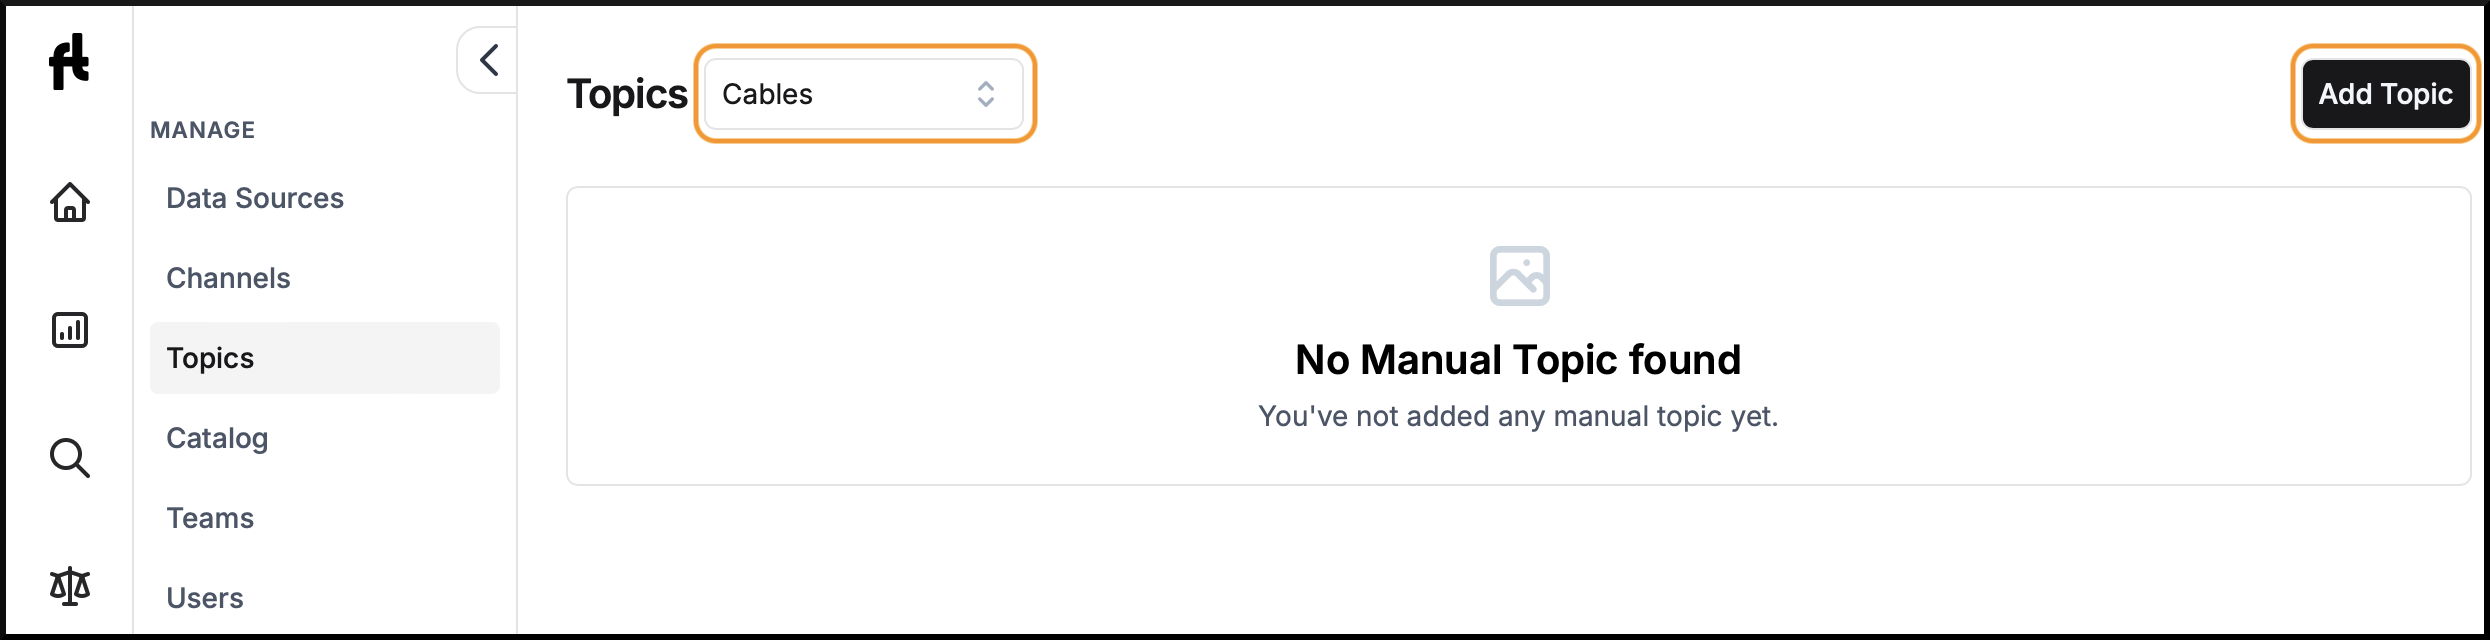
First, select the relevant category from the dropdown menu where you want to add the new Topic.
Click on the ‘Add Topic’ button in the top right corner to create a topic.
1. Describe the topic
-
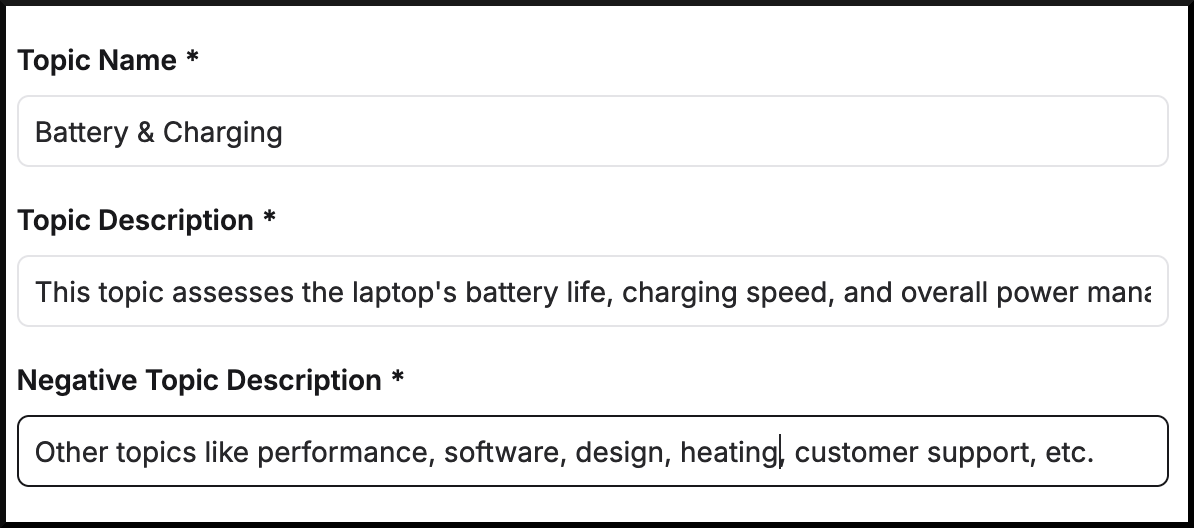
Topic Name: Enter a name for the topic you want to create. This should be a concise, descriptive title.
-
Topic Description: Enter a brief description of the topic. This helps to provide context and detail about what the topic covers.
For example, Topic description for topic ‘Battery’ can be ‘This topic assesses the laptop’s battery life, charging speed, and any issues related to battery performance.’
Best Practices:
- Be clear and specific about the scope of the topic.
- Incorporate terms that are closely associated with the topic.
- Keep the description concise and focused.
-
Negative Topic Description: Enter descriptions or aspects that are not relevant to your topic. This helps the AI model to exclude irrelevant content.
For example, the non-topic description for ‘Battery’ can be, ‘ Topics not related to battery like keyboard, packaging, shipping experiences, etc.’
Best Practices:
- Clearly specify what aspects are considered unrelated to the topic.
- Provide clear examples of what is not included.
2. Generate Example Phrases
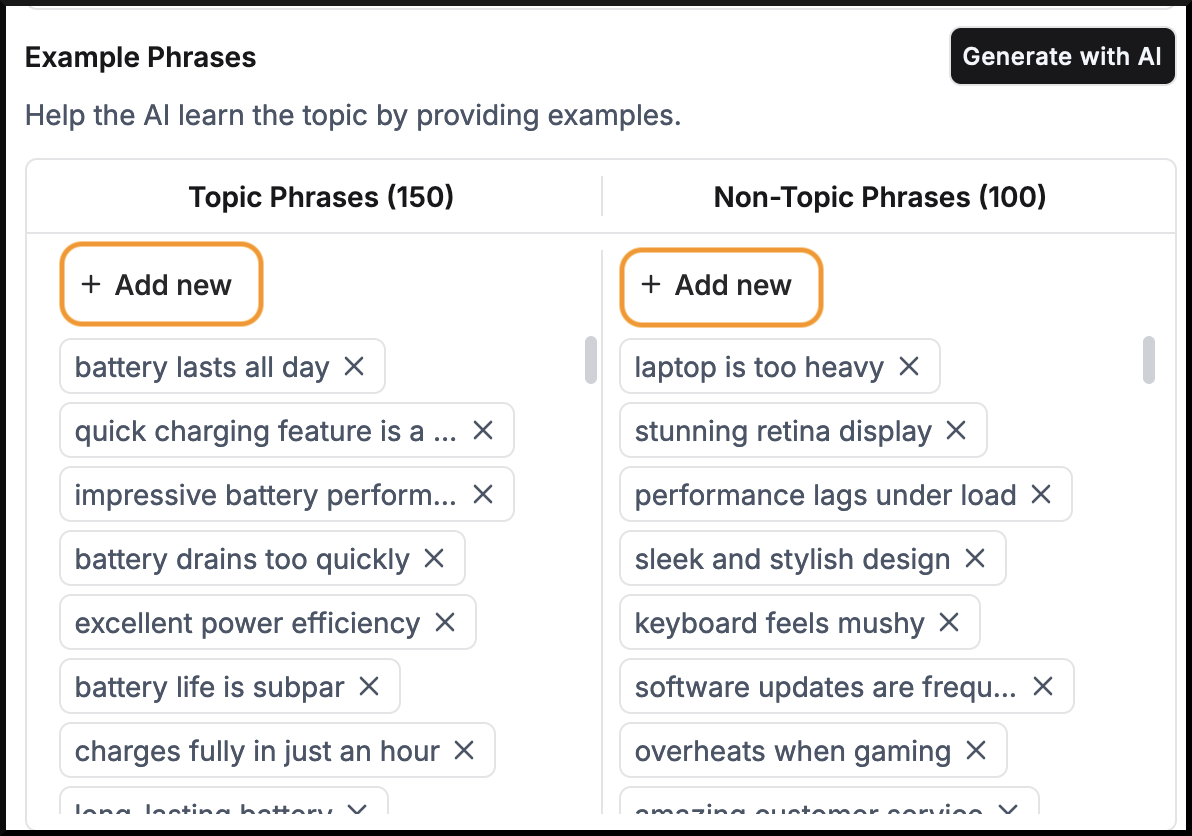
- Click ‘Generate with AI’ to prompt the AI model to generate suggested Example Phrases relevant to the current topic. This includes both Topic Phrases and Non-Topic Phrases, based on the information provided.

3. Review Example Phrases
Once the phrases are generated, they will be automatically populated in the Topic Phrases and Non-Topic Phrases boxes.
-
Topic Phrases: These are phrases that the AI has identified as relevant to your topic. You can add new phrases by clicking ‘Add new’, or remove incorrect phrases by clicking the ‘X’ next to each phrase. (Example: ‘poor bass levels’, ‘clear treble’, for topic ‘Sound’).
-
Non-Topic Phrases: These are phrases that the AI has identified as not relevant to your topic. Similar to Topic phrases, you can add or remove phrases to refine the model.(Example: ‘does not connect to Wi-Fi’, ‘battery life is good’ for topic ‘Sound’).
Best Practices:
- Include phrases to cover all aspects of the topic.
- Include both positive and negative examples to avoid bias.
- Regularly check and correct misclassifications to refine the model.
4. Run Model
- Click on the ‘Preview Model Result’ to process the example phrases and display how the AI interprets various phrases in the context of the topic.

5. Check & Correct Model Results
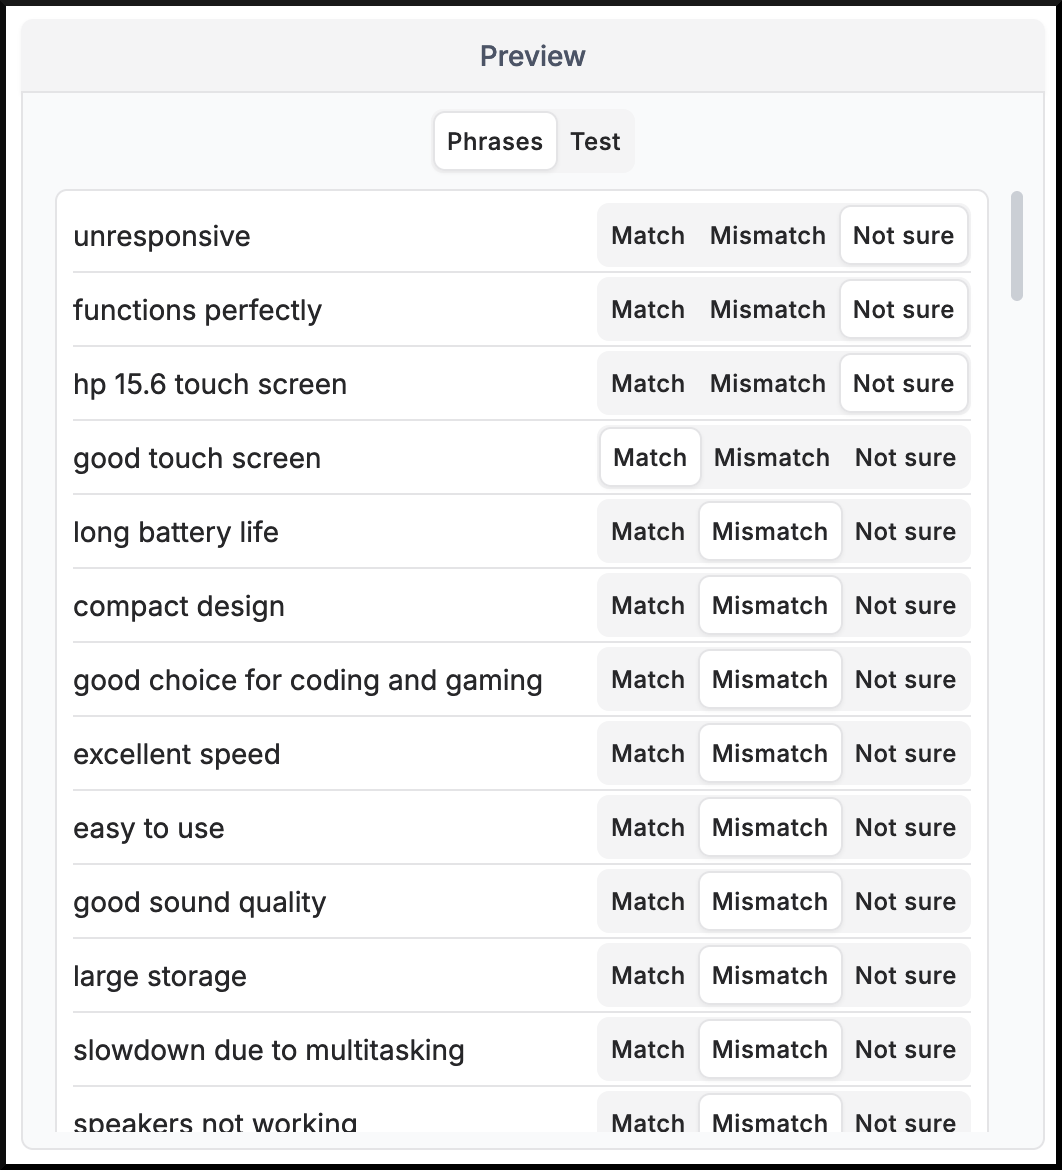
After clicking ‘Preview Model Result’, the AI analyzes example phrases and populates the 'Phrases' tab under the preview section on the right-hand side. Here, you'll find various phrases in the context of the topic and their categorization as a match, mismatch, or uncertain.
-
Match: Indicates if the phrase matches the topic.
-
Mismatch: Indicates if the phrase does not match the topic.
-
Not Sure: Indicates if the AI is uncertain about the categorization.
If the AI has incorrectly classified a phrase, you can adjust its status by clicking on the ‘Match’, ‘Mismatch’, or ‘Not Sure’ buttons. These phrases will then be added to the corresponding ‘Topic Phrases’ or ‘Non-Topic Phrases’.
6. Repeat the Process
Continue refining the example phrases and previewing results until the AI classifies phrases correctly. Repeat Steps 3 to 5 as needed, making adjustments to the topic definitions and example phrases until you're satisfied with the AI's performance.
7. Create Topic
Once you’re satisfied with the AI’s performance and the classifications are correct, click on the ‘Create Topic’ button. This will finalize your topic, and it will be added to your list of topics.

8. Refresh Product Data
Update the product data to reflect the newly created topics:
-
Navigate to ‘Variant Report’ or ‘Product Report’.
-
Select a product or variant.
-
Click ‘Priority Refresh’ 🔄 to update the product with the latest topics.

9. Examine Topics in Topics Report
-
After refreshing the product data, navigate to the ‘Topics Report’.
-
Select the product you have refreshed to review the topics and their associated phrases for accuracy.
Identify Misclassified Phrases:
-
If a phrase does not belong to the topic, you can add it as a test case, as detailed in step 10.
-
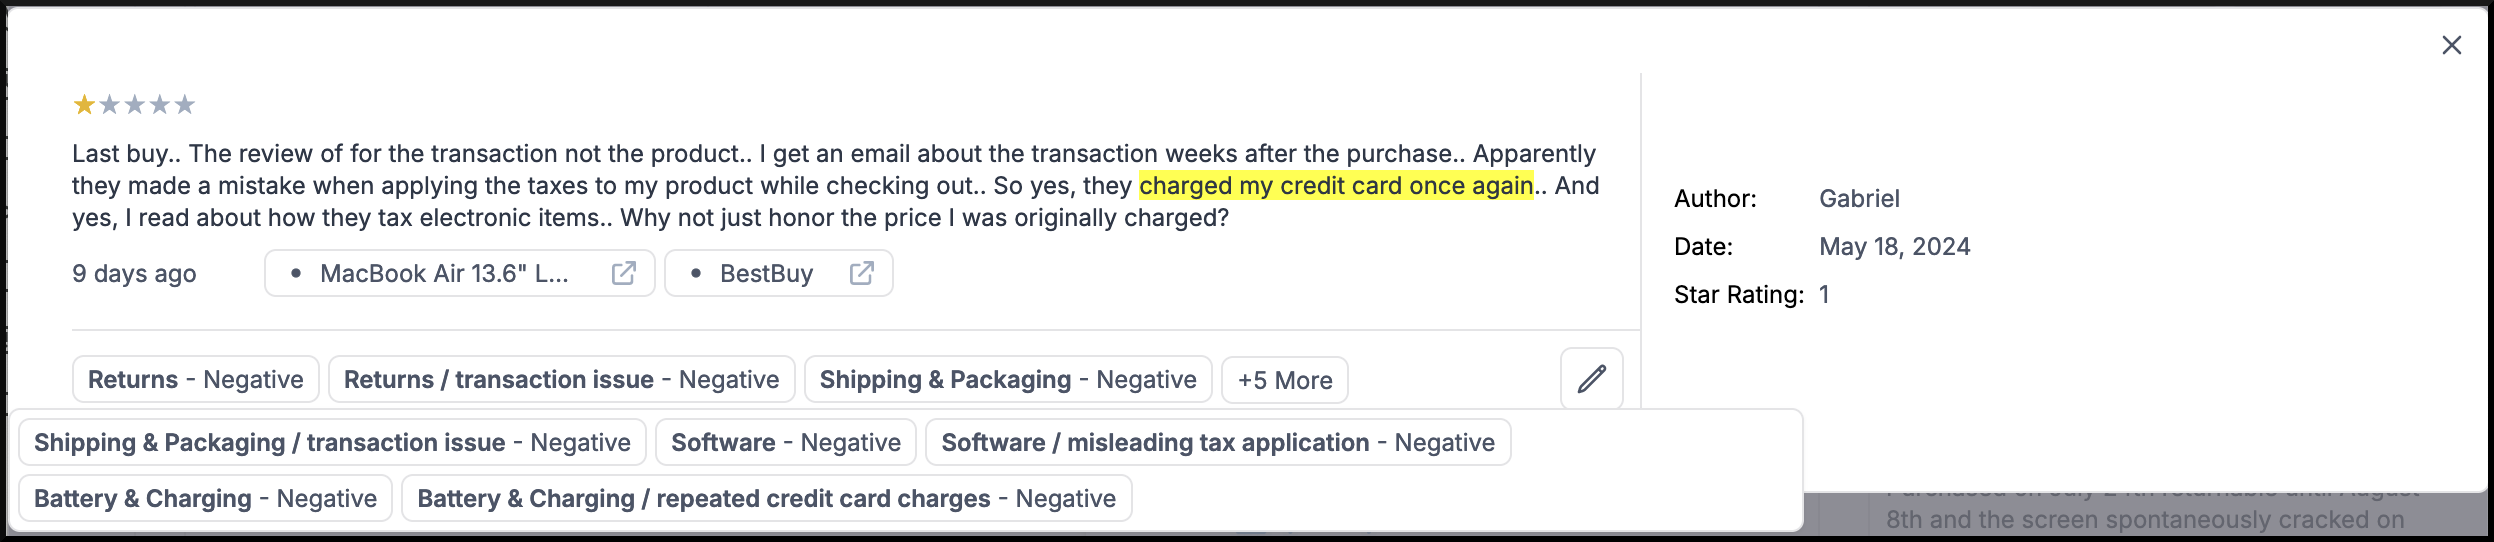
Click on Topics, Subtopics, or Phrases to reveal associated reviews in the right-hand side (RHS) window.
-
Clicking on a review opens a dialog box with the complete review and the associated ‘topic/phrase-sentiment’ or ‘topic-sentiment’.
-
Verify if the topic/phrase classification is accurate.For example, a phrase related to the keyboard should not be categorized under the camera topic, Such instances should be considered as misclassifications and added as test cases.
10. Add and Validate Test Cases
-
Navigate to ‘Manage > Topics’
-
Click the ‘Edit’ button next to the topic you want to add the test cases to.

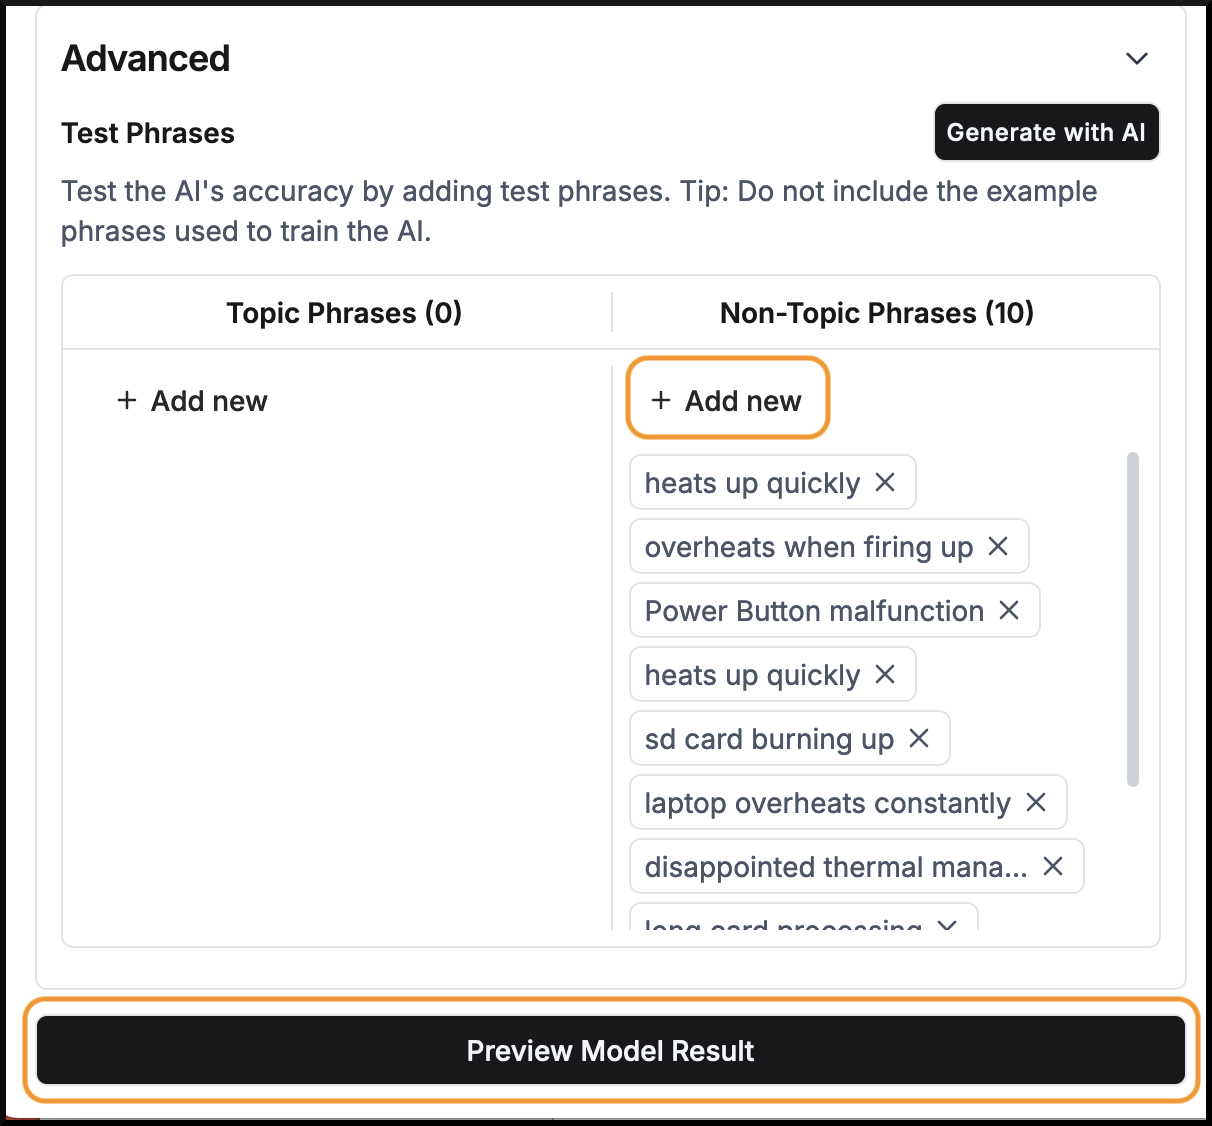
- Scroll down to the ‘Advanced’ section on the edit topic page and click on it. Here you can add custom test phrases to validate the topic’s definition.

-
Under the ‘Non-Topic Phrases’ box, click the ‘Add new’ button to enter the identified test phrases.
-
Click ‘Preview Model Result’ to display the test results in the ‘Test’ tab under the preview section on the right-hand side. Here, you can check for the model's accuracy in classifying phrases.
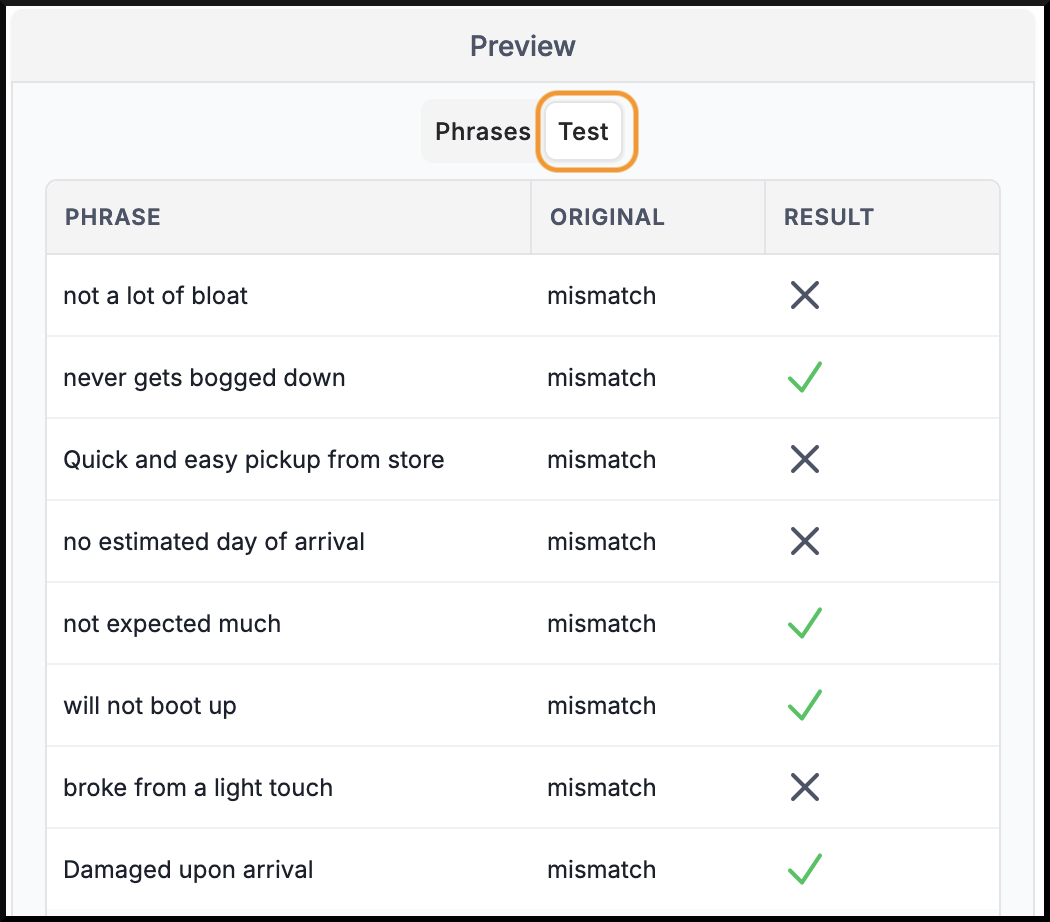
The ‘Test’ tab has 3 columns:
-
PHRASE: The test phrases that are being evaluated.
-
ORIGINAL: Indicates the original classification of the phrase.
-
RESULT: Shows the outcome of the test, indicating whether the model's classification matches the expected classification.
-
A check mark (✔) signifies a correct classification by the model.
-
A cross (╳) denotes a mismatch between the model’s classification and the expected result.
-
-
If the test cases fail (indicated by a cross), it suggests that the model has not learned the correct patterns for that topic.
-
To improve the model’s accuracy, add similar example phrases or refine the existing data.
-
After making adjustments, review the model's performance by selecting ‘Preview Model Results’ to address any discrepancies.
-
Repeat the process until all test cases pass, ensuring the AI correctly classifies all phrases.
11. Finalize and Apply Changes
-
Ensure all phrases are correctly classified under respective topics.
-
Based on test results, fine-tune the example phrases.
-
If significant changes were made, Click on ‘Update Topic’ to apply the changes.
-
Refresh the product data to apply updates.

By following these steps, you can iteratively refine the AI model to ensure accurate phrase classification.
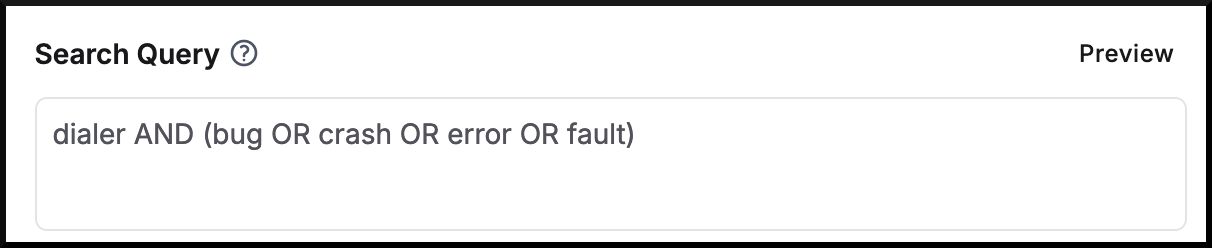
Optional: Optionally, you can enter a search query to define what content should be included in the topic.(E.g.,dialer AND (bug OR crash OR error OR fault), which would search for issues related to a dialer that include bugs, crashes, errors, or faults).
Update Topic
To update an existing topic, follow these steps:
-
Navigate to ‘Manage > Topics’ from the left-hand navigation bar.
-
Find the topic you want to update, click the ‘vertical ellipsis’ ⋮ button next to it, and select ‘Edit Topic’🖉 .
-
Modify the topic details, example phrases, and test cases as needed. You can follow the same steps outlined in the ‘Create Topic’ section for guidance.
-
Once all updates are made, click ‘Update Topic’ to apply the changes.
Optional: After updating the topic, you may want to refresh the product data and review the updated topic in the Topics Report to ensure the changes have been applied correctly and that the topic is accurately classifying relevant content.
Delete Topic
To delete an existing topic, follow these steps:
-
Click on ‘Manage’ from the left-hand navigation bar and select ‘Topics’.
-
Find the topic you want to update, click the ‘vertical ellipsis’ ⋮ button next to it, and select ‘Delete Topic’ 🗑.

Note: Deleting a topic is a permanent action and cannot be undone.